Collaboration thanks to the remote repository
As I described in previous post, when I joined to my current company, we hadn’t any versioning system, not even SVN, and we used to FTP all files to a number of backup folders. I introduced Git on local servers. Everything started to seem better, but after some time we started to work with some people from abroad and one of colleagues started to work from home. That meant that they couldn’t connect to local network to push to GIT. Setting up VPS wasn’t option, as our boss was worried lot about the security and didn’t want to people connect to office network from home, etc. Private repositories on GitHub are paid for and codebases of our clients couldn’t be shared worldwide. I remembered, that in one of my previous jobs we used bitbucket, which was free to team of 5 developers and offers unlimited number of repositories. It seemed that boss will be happy with free tool and manager will accept that repositories are private and offers access management.
What we want to achieve?
We already had our codebase under git repository. I didn’t want to lose the history of commits. We also had some branches, with some dev work on it. Those branches weren’t approved and safe to merge into master branch. I wanted to have all this stuff also on bitbucket. You will see that this process is really easy. Our current repository is tracking the existing remote repository on our local server. So first, we will remove the tracking of remote repository on local working directory, then we will create new repository in bitbucket, and we attach our local repository to bitbucket as remote and push all changes to this new remote repository in bitbucket.
Prerequisites
- bitbucket account (free)
- unix terminal
- local working directory of GIT repository.
1. Detach the remote from your local repo
First let’s go to the projects folder
	Stefans-iMac:~ stefan$ cd Projects/myproject.dev/
    Stefans-iMac:myproject.dev stefan$
Git has command to manage set of tracked (“remotes”) repositories. It’s called git-remote.
	Stefans-iMac:myproject.dev stefan$ git remote
    origin
As you can see our working directory is tracking repository called origin. Where that is, is not clear at this moment,
but using the verbose parameter -v we can see where is it located.
	Stefans-iMac:myproject.dev stefan$ git remote -v
    origin  user@192.168.1.26:Repositories/myproject.git (fetch)
    origin  user@192.168.1.26:Repositories/myproject.git (push)
Working git directory can track more than just one remote, and you can pull or push to any of them (depends on permissions).
But, let’s not talk about permissions in this article. Now we are going to remove the remote repository, called origin
in our case.
Stefans-iMac:myproject.dev stefan$ git remote rm origin
2 .Create new Bitbucket repository
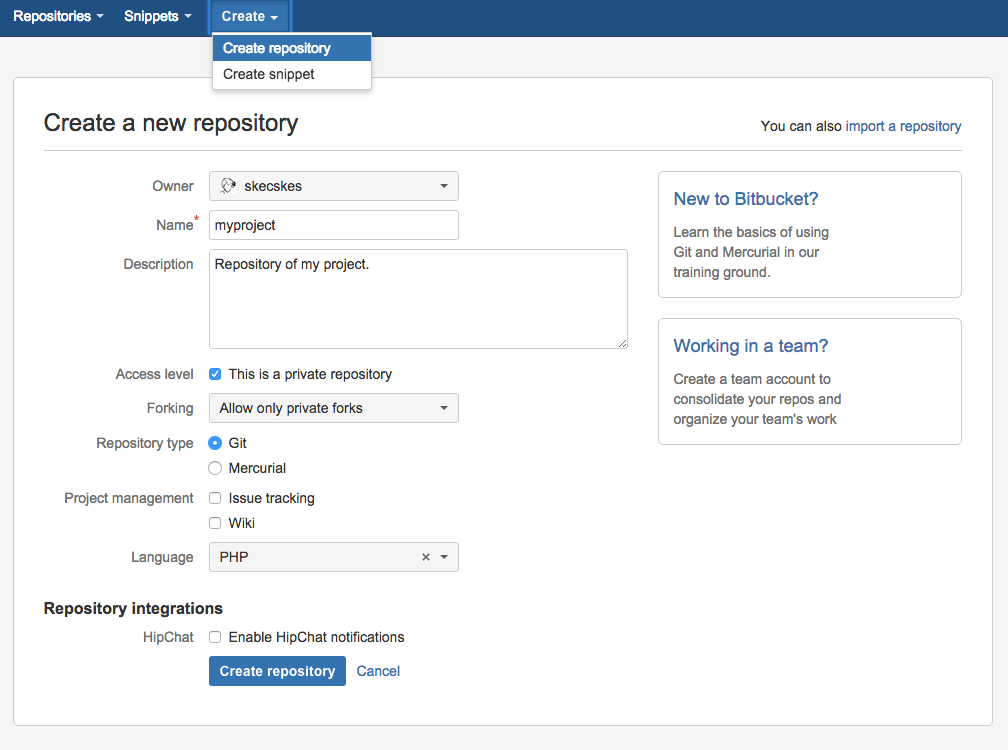
We need to log in to our bitbucket account and select to create new repository form the top menu, then fill the simple form and voilà. We have new repository.

In next step we will need to have the link to repository and for that we will need https url. You can find it in repository Overview page and make a copy into your clipboard.

Mine GIT https URL looks like this: https://skecskes@bitbucket.org/skecskes/myproject.git
3. Attach your code to new remote repo and push your project
Now lets get back into terminal into our project folder. We will use the URL of our remote repo to attach it to our project.
Stefans-iMac:myproject.dev stefan$ git remote add origin https://skecskes@bitbucket.org/skecskes/myproject.git
We can check now if the remote repo is correctly attached.
	Stefans-iMac:myproject.dev stefan$ git remote -v
    origin	https://skecskes@bitbucket.org/skecskes/myproject.git (fetch)
    origin	https://skecskes@bitbucket.org/skecskes/myproject.git (push)
Yes, we can see it is attached. So we can push our project to remote repository. Probably you will need to enter your password for bitbucket. You may also wait a few moments while project is uploaded.
    Stefans-iMac:myproject.dev stefan$ git push -u origin --all
    Password for 'https://skecskes@bitbucket.org':
    Counting objects: 18702, done.
    Delta compression using up to 4 threads.
    Compressing objects: 100% (18666/18666), done.
    Writing objects: 100% (18702/18702), 73.54 MiB | 636.00 KiB/s, done.
    Total 18702 (delta 16400), reused 0 (delta 0)
    To https://skecskes@bitbucket.org/skecskes/myproject.git
     * [new branch]      booking-system -> booking-system
     * [new branch]      develop -> develop
     * [new branch]      master -> master
    Branch booking-system set up to track remote branch booking-system from origin.
    Branch develop set up to track remote branch develop from origin.
    Branch master set up to track remote branch master from origin.
The project code is now successfully pushed to remote repository. It also created all branches I had locally in remote
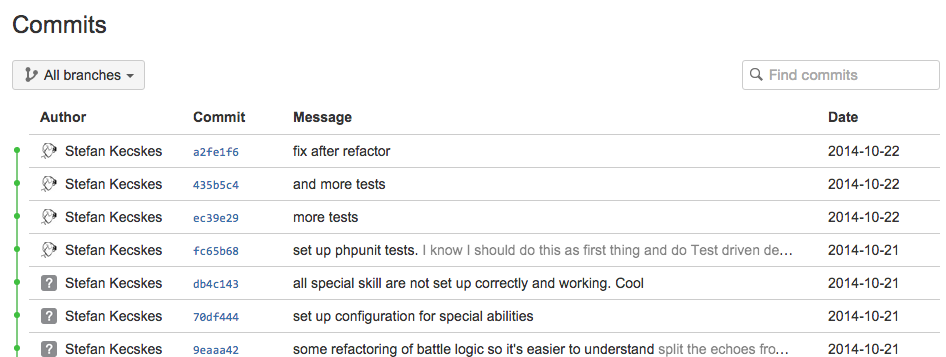
repository. We can now log into bitbucket and see all our code there, altogether with commits history. There is one more
step you might like to do, just in case you have used tagging (v.1.0.0 etc.). The tags are being added to repository
separately, by using command git push -u origin --tags , which pushes all tags from your local repository to
the new bitbucket repository.

Conclusion
I showed you how easy is to create new repository in bitbucket. We have learned how to check what remote repos is tracking your project, we detached remote bare GIT repository from the working directory of project and we learned how to attach another remote repo to local project. In steps above I used the bitbucket, but the process would be very same for any other remote repo (github, your subdomain, etc…).
I also hope that there are no other obstacles preventing my dev team members from using git and revert to ftp backups.